Saturday 30 September 2017

Crackle Week - Stamped Button Card

Just Keep Breathing Stamped Crackle Card by Dana Tatar for Tando Creative

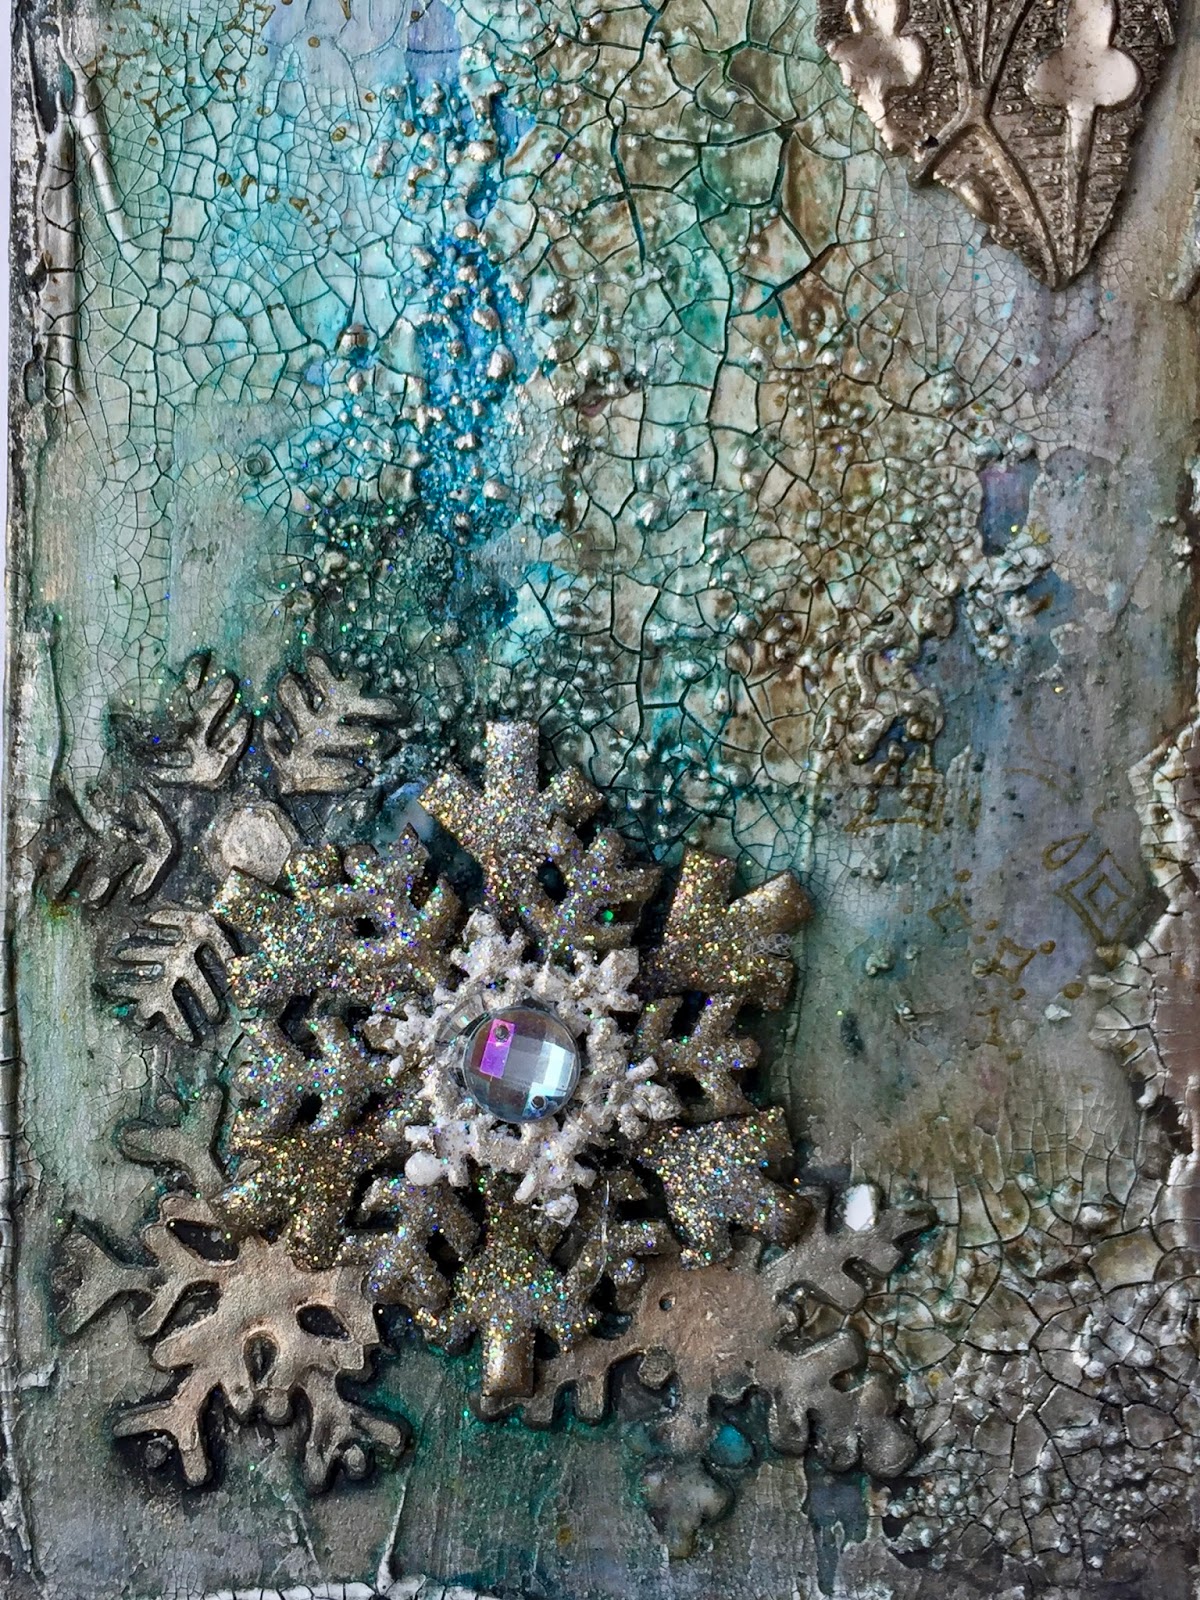
Hi friends! Dana here today sharing the card I created for the Crackle Theme this week. I had a lot of fun with colors and patterns for this project. I assembled a simple layered card base and wanted to create a fun focal point.

Just Keep Breathing Stamped Crackle Card Closeup by Dana Tatar for Tando Creative

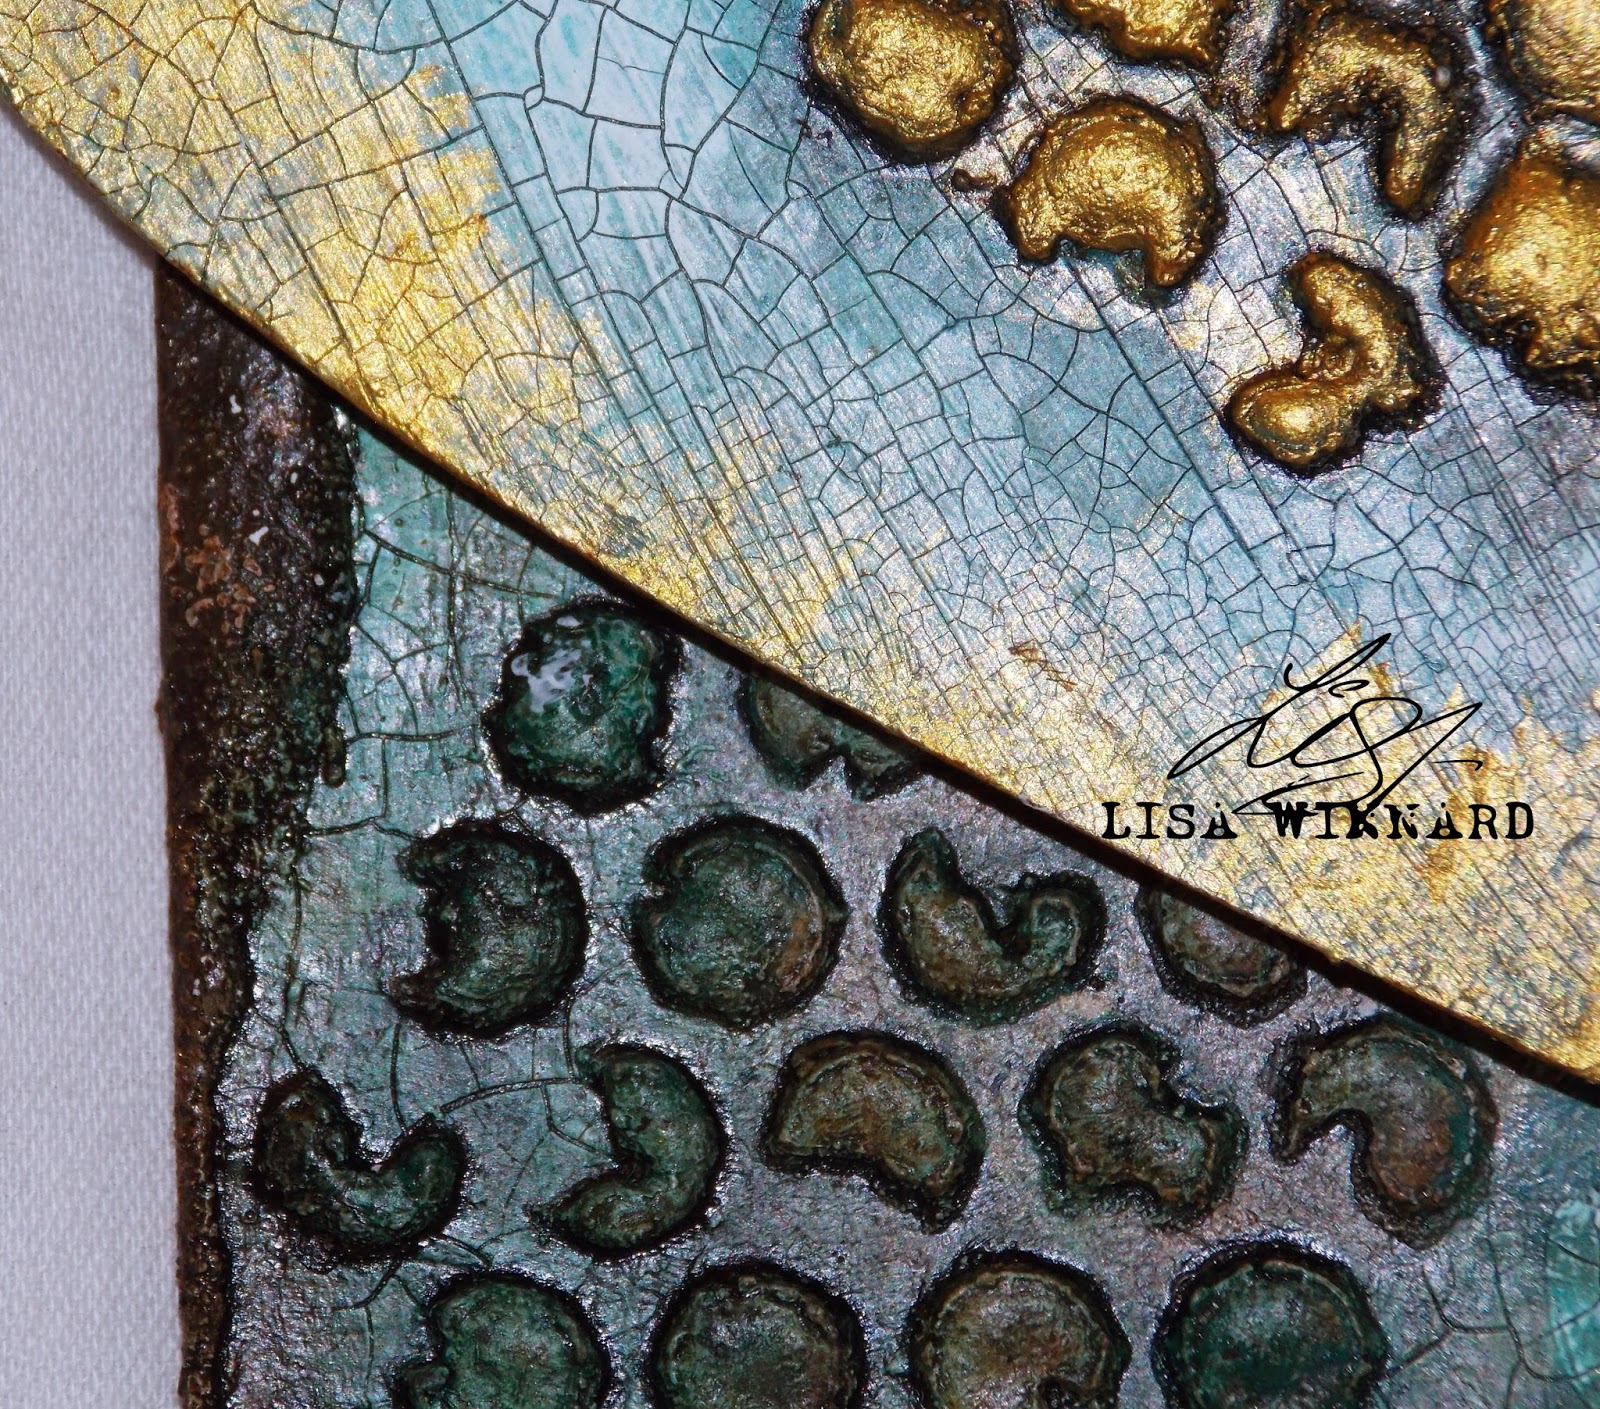
I used the Valley Road Positive and Negative Foam Stamp Set from Nathalie Kalbach with ink on white cardstock and vellum to create a 2-layer circle piece for the center of the card. Next, I filled the holes in the middle of the stamping with jeweled brads. Finally, I stitched a Button that I painted first with DecoArt Cadmium Red Fluid Acrylic and then with a mix of Primary Yellow Fluid Acrylic and White Crackle Paste. I finished this card with a sentiment sticker.

You can find the products I used for this project in the Tando Creative Retail Store. We'd love to see your creativity! Share your work with us in Tando's Creative Zone on Facebook.

Friday 29 September 2017

Crackle week with Dee

Hi Everyone Dee here with my crackle project for the week.
I have gone for a Grungy Christmas scene
with touches of gothic and lots of 
Snowflakes.


Products Used 
  1. Tando :- Size 10 large tag, Mini mask snowflakes, pack of 5 snowflakes, Minis snowflakes.
  2. Chocolate Baroque:- Gothic fragments
  3. Deco Art:- Gesso, Dimensional paste, crackle paste, white modelling paste, glazing medium, Media Interference - Turquoise, & Black and Raw umber antiquing cream.
  4. Stampendous:- Chunky Clear Embossing Enamel, Chunky Silver Embossing Enamels, Frantage Jewel Kit: SILVER.
  5. From my stash:-  Lindy's stamp gang Industrial Chic- MAGICAL Shimmer Powders


I started by putting crackle paste through the snowflake stencil
and sprinkling on chunky white embossing powder but
didn't like the effect so i covered it all over with 
crackle paste and modelling paste,

Once dry I used dimensional paste through the snowflake stencil 
at the base of the card I had put crackle paste & around the edges.


I used a selection of snowflakes and embossed them with a variety of 
#Stampendous embossing enamels and glitters.


I used my tripple embossing technique with silver Frantage set
then used the Chocolate Baroque gothic stamps.


I know its early but thought I would get in there with a bit of sparkle 
to brighten our week in a grungy way.
Let us know what you think.
Cheers Dee x


Thursday 28 September 2017

Crackle week with Tando: Happy New Year door hanger


  Hello my dear crafty friends and welcome to my new Tando post.
This time the designers were challenged to make projects with crackle and as you know DecoArt has the best crackle pastes ever!
So to make this altered door hanger I used Tando chipboards and added DecoArt gold acrylic and then covered the paint with Crackle glaze.
On the edges I added DecoArt crackle paste and misted it with gold mist.


 Here you can see the difference between both crackles and to pick whatever you like more for your own projects.


 Tando products used to make this project:
Door hanger style A
Door Hangers style A

Brush stroke trees
Brush Stroke Trees

Happy New Year- retired
DecoArt Media Line 

Wednesday 27 September 2017

Crackle Week with Lisa

Hi folks and welcome to my blog post for Tando. This week, the theme is 'crackle'.
Everyone loves a bit of crackle don't they???


Here is my creation...


This week I used another one of the Tando long tags. (Yes, I am definitely addicted to these Tando tags!) And one of the hearts from the Tando grab bag of hearts

First, I added a layer of card stock with a wooden pattern over the front side of the tag with PVA glue and let dry. And painted the heart with DecoArt white gesso.

I added DecoArt crackle paint all over the surface of the heart and around the edge of the tag.


I used DecoArt texture sand paste and the Tando 4 x 4 distressed sequins mini stencil on the heart and the tag


Then used the paste around the edge of the tag.


I painted the tag and the heart using DecoArt Media Fluid Acrylic paint. Then I added gold metallic paint on the heart.


Thanks for popping by to view my blog post. Leave a comment if you wish, I love to hear your thoughts.
If you would like to pop over to my blog, here is the link.
Toodles for now,
Lisa x


Everything I used to make this project is shown below and is  available on the Tando Website.

Set of 5 Long Tags    Grab Bag of Hearts    Mini Mask - Distressed Sequins   Fluid Acrylics: Burnt Umber   Fluid Acrylics: Cobalt Teal   Fluid Acrylics: Gold Metallic   Fluid Acrylics: Paynes Grey   Fluid Acrylics: Phthalo Green-Yellow   Media: White Crackle PAINT   Media: Texture Sand Paste   Media: White Gesso 

Tuesday 26 September 2017

A Fragile Heart by Jane

Hello!

I am really pleased to be back for another post for Tando Creative, especially as this week it is Crackle Medium!  These are some of my favourite products and effects and I decided to go for quite a subtle crackle look which is why I have included some close up photos in my post...


At the moment I seem to have a bit of a love of wings, so I decided to create a winged heart using the heart shape from the Industrial Wings kit plus one of the larger wing sets.

I started with the background on the tag using the Industrial Elements stencil and texture paste, then created a pitted and rusted metal effect using paint and salt (as demoed by Andy Skinner).
On the wings and cog I used the Decoart crackle paint which gives a lovely egg shell type crackle effect, then used the patina antiquing cream and finally a wash of quinacridone gold to age it even more...


As I wanted slightly bigger cracks on the heart I used the crackle paste, which was also painted then antiquing cream added.
I was lucky enough to attend one of the days at Di's Tando retreat in August so used some of the circle grid that I had left and dipped it in watered down Prussian blue hue, as we had learnt in the workshop, for a bit of background detail.  Then the little nuts and bolts from the Industrial Elements set were made to look like rusty metal using Decoart paints and gilding wax...


Finally the main finishing touch was the sentiment from the Handle with Care stamp set, and to add a different sort of crackle that did not require any medium I used the crackle stamp from Bee Crafty...


Touches of gilding wax were then added and finally I punched extra holes into my grey board tag to create a rusty wire hanger!

These are some of the products I used, you can click on the links to see more details...

* Greyboard Tag Size 9 (Tando)
* Wings Set (Tando)
* Industrial Wings Kit (Tando)
* Industrial Elements Kit (Tando)
* Grid Round (Tando)
* Industrial Elements Stencil (Andy Skinner)
* Handle With Care Stamp Set (Andy Skinner)
* Decoart Crackle Paint
* Decoart Crackle Paste
* Decoart Fluid Acrylics

Thank you for taking the time to look at my project and post, it is much appreciated :)

Happy crafting and crackling!

Jane xx


Monday 25 September 2017

Crackled Panel

Hi all, Hannah here with yummy crackle post for you!


Here we have one of the tags from Kate Cranes Tag Kit painted with layers of DecoArt Chalk Paints. Using the wax resist technique, layers are rubbed away to reveal the colours underneath. On top of this a I painted a layer of DecoArt Weathered Wood, and once dry a layer of white chalk paint was added to create the crackle effect.


On to the background embellishments have been added, painted with a rusty technique created using DecoArt Media Fluid Acylics.


A few more rusty embellishments have been added, along with some vintage style tickets.


Tando products used;


Sunday 24 September 2017

Anything Goes by Gez

I am delighted to be sharing my birdhouse with you today for Tando's 'Anything Goes' challenge this week.

The 3 piece Christmas Birdhouse is laser cut from sturdy greyboard and comes with holly flourishes, bird, branch and the word Merry Christmas as embellishments, along with a wooden dowel and pre-cut holes making assembly so easy!

This gorgeous [Christmas Birdhouse] kit can be decorated in any style you fancy and made to match your home decor or can make the perfect gift.

All the different pieces were painted first and left to dry before assembling, using [DecoArt paints]


The sides of the birdhouse were decorated using patterned scrapbook papers and once everything was dried and assembled, PVA glue was applied to the roof and base of the birdhouse then sprinkled with  and glitters from the [Stampendous] Frantage Jewel Silver Kit and [White] kit to look like snow and frost!


 I hope you like this birdhouse as much as I do! Thank you for calling.

  Have a lovely day, Gez ♥


Saturday 23 September 2017

Art Journal Kit

Hi Everyone it's Brenda here with my very first post for the Tando Creative Team and I'm so happy to be here using Di's wonderful products and 'working' alongside so many very talented people.
Towards the end of August I was able to attend one of Di's workshops at Let's Be Creative in Rogate in Hampshire and had a wonderful time using the Art Journal Kit. It's a fabulous kit which comes with covers, drilled spine for sewing the signatures in, a wraparound spine and the needles and thread for sewing the pages together. Here's the front and back covers together -


Those who know me will be used to my vintage, shabby, timeworn creations and although these whimsical birds are not normally my style I loved playing with their shapes and using more neutral colours on them to be the focal points on the front and back covers.


I had also taken some hessian ribbon and vintage narrow ribbon and used these on the wraparound spine to provide more detail and when I got home I used the DecoArt media acrylics to add a card border too.


I have a couple of more photos over at Bumblebees and Butterflies if you'd like to visit me and I look forward to being back soon.

hugs Brenda xxx

Friday 22 September 2017

Anything goes

Hi folks Dee here with my post for anything goes week.
I have gone back to Tando's lovely media boards 
for this piece. I used Deco art modelling paste 
side of the media board. I was at Ally pally at the
weekend and purchased this little fella.
I have been looking for this kind of stamp for a long time
I had to draw my last one by hand.
in washes over the modelling paste along with 
antiquing cream. 
As always a little bit of bling.
Cheers Dee x